Our Farmhouse From the South

Hello! It has been a while since I’ve put together what we have been up to with our 1883 year old farmhouse because the last year has been a doozy!

I finally have before and after photos to share, and can’t believe we finally made it to the finish line. I think it’s time to hang our hats and celebrate.

It has been a few solid hard years since the addition + chasing our tail on the exterior to finish wrapping the house up. From fixing the foundation, to replacing the roof, we have hit more than one bump in the road I must say. Having to fix the rotting brick chimney being one of those hard bumps neither of us was expecting.

The before!

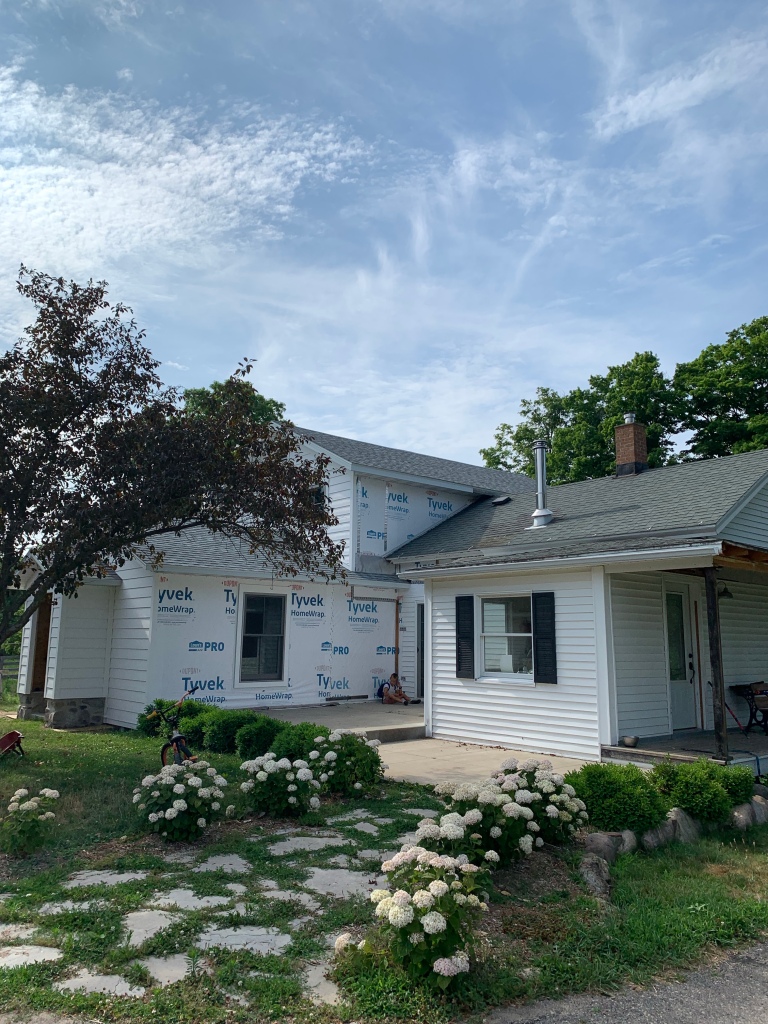
The photo above is a picture of our home from the south. This was taken last summer. You can see on the left, the far room, has a new roof and siding. The house on the right is in need of both! Before getting to the siding and roof, first Doug had to fix a few things!

If you really stare at the before photo, you can see that the roof of that little room was also the roof to the porch! And boy oh boy did that cause a lot of problems. It meant the porch had to come off to work on that room. I’m sure you can guess why we waited until spring to start this endeavor?!

One major design challenge was deciding how we wanted to enter our home. In the before photo you can see an entrance door into that room off the back. We used this room as a mudroom which lead into the kitchen. With removing the porch, it would leave that door exposed and leaving us with a lot to think about! After much debate, we removed the door and made this room to the south a pantry! For those worried we lost an entrance and exit, not to fret because we added one not too far from there!

This is the new entrance. We eliminated that side door under the porch (you can see in that first photo) and the front door which was never used! We added a “front side” door if you will with the handiest little mudroom here!
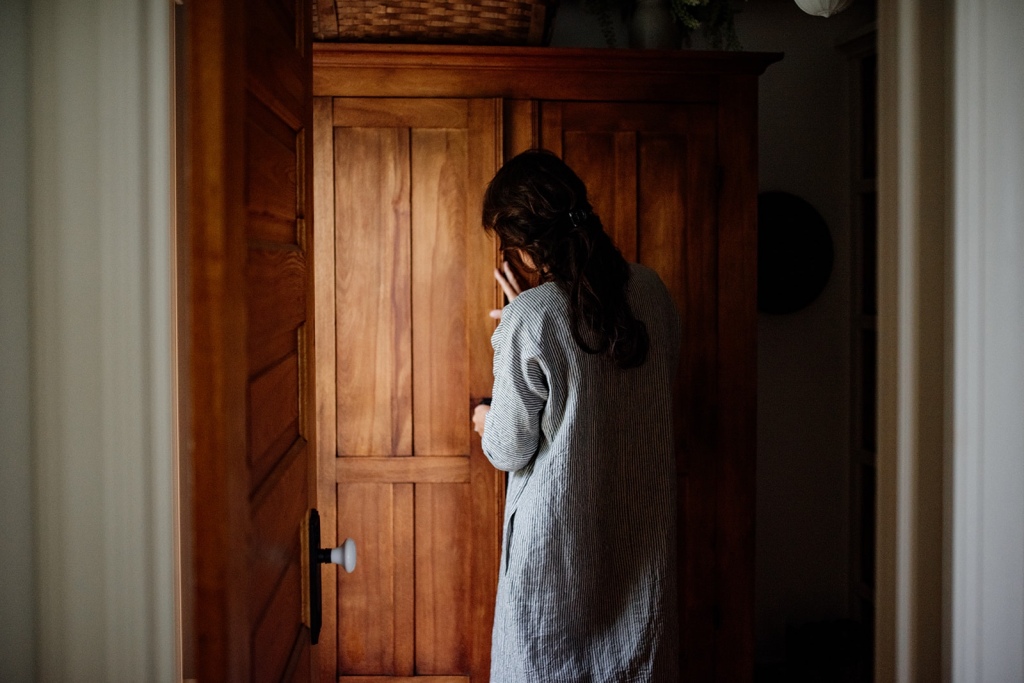
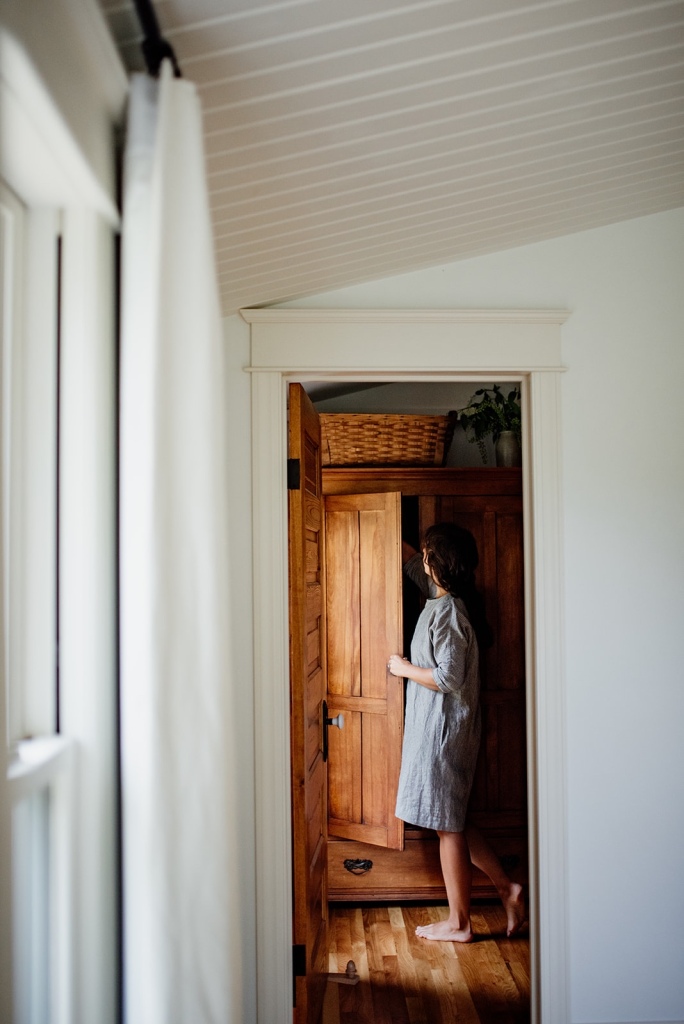
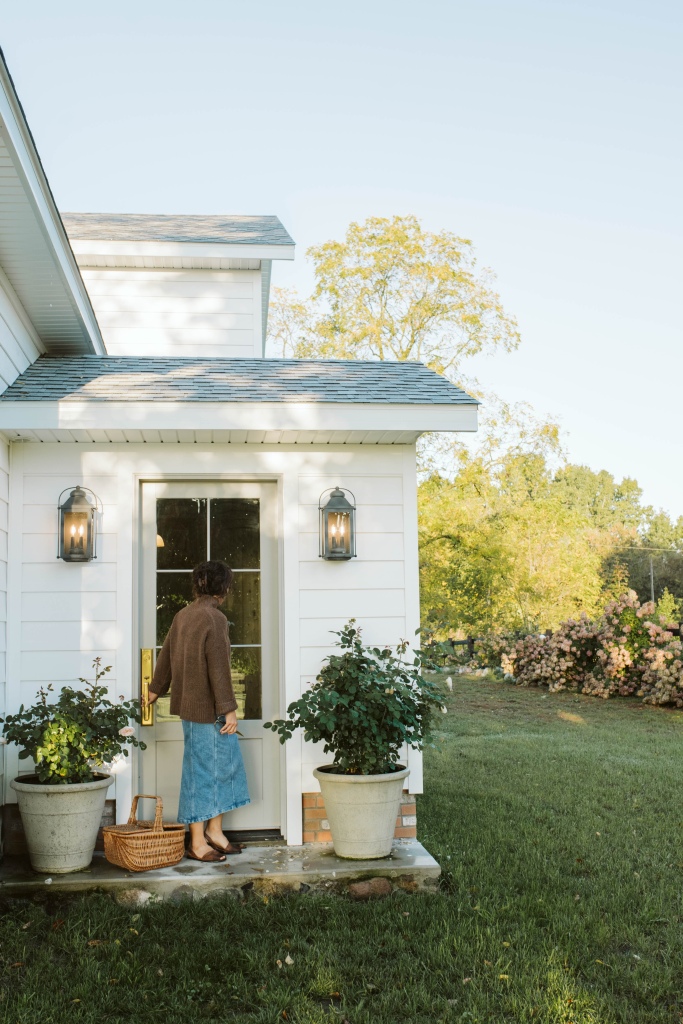
Photo taken by Amy Carroll photography
Photo by Amy Carroll photography

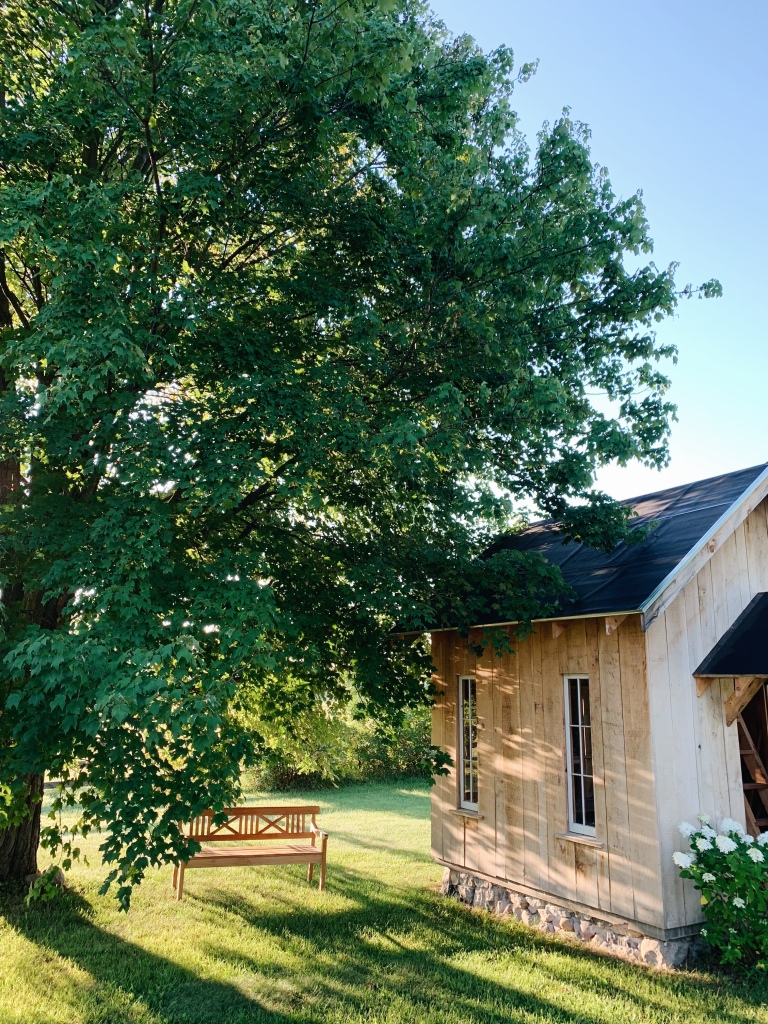
Another area we worked hard at achieving was making the home look original. Over the past century to century and a half, additions were made and pieces were changed only one area at a time. In tackling the exterior of this house, we wanted to work our way around in its entirety. Making all those bits and pieces look as though they were here from the very beginning.

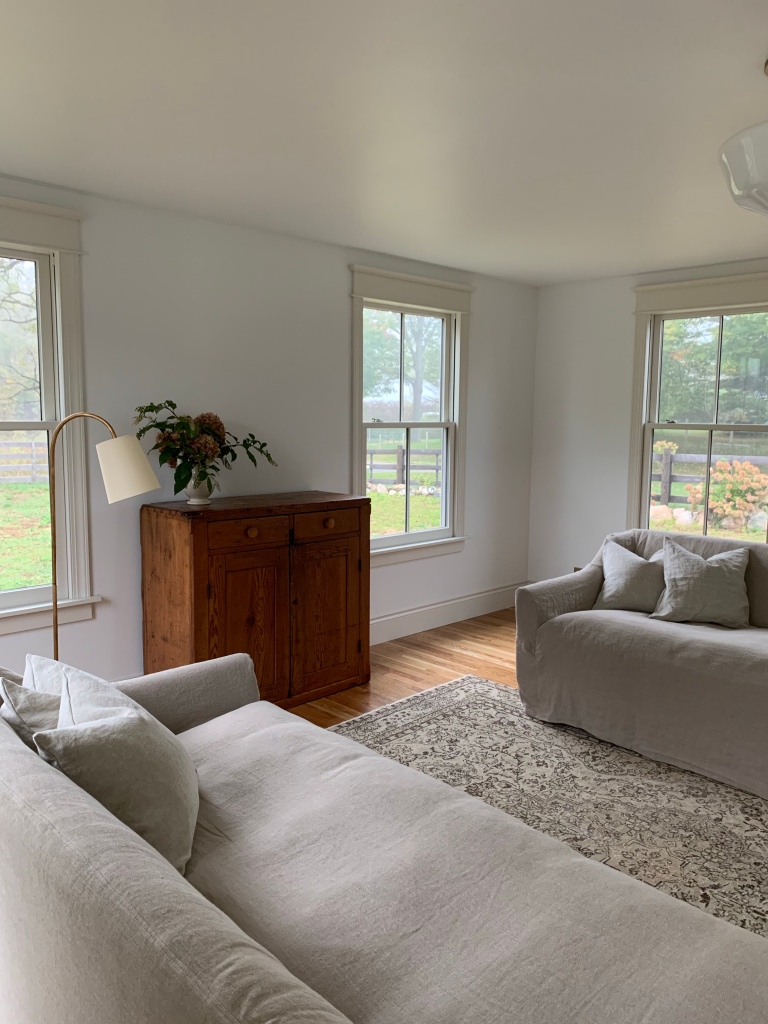
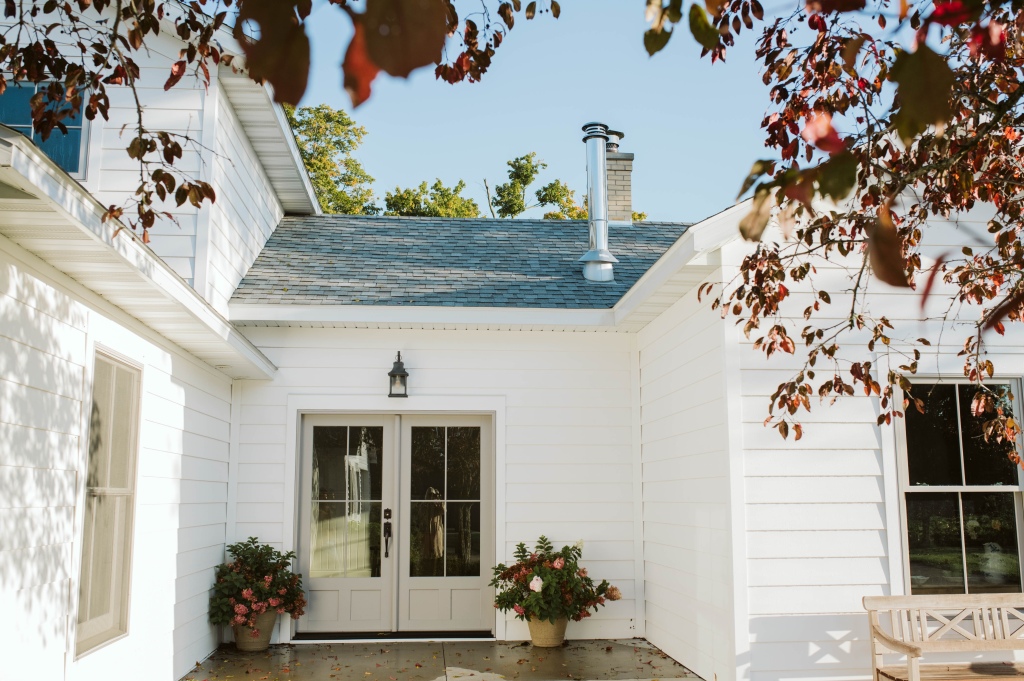
One of the easiest ways to tell areas that had been added was by the change in windows. The windows placed in the additions were short and wide, where as the original home had much taller windows. We both wanted the additions to look cohesive to the old home. We choose to work with the same size windows for every area of the house. This posed as a challenge in more than one way, but in the end we were able achieve our goal. I think it made all areas of our home look more original than ever before!

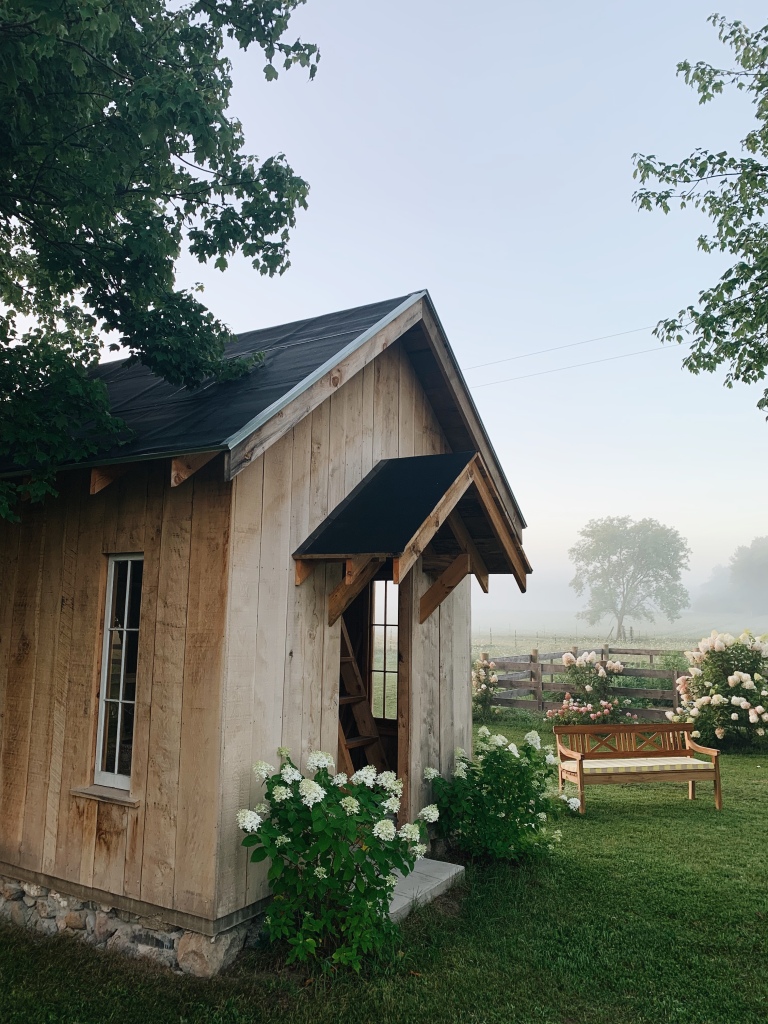
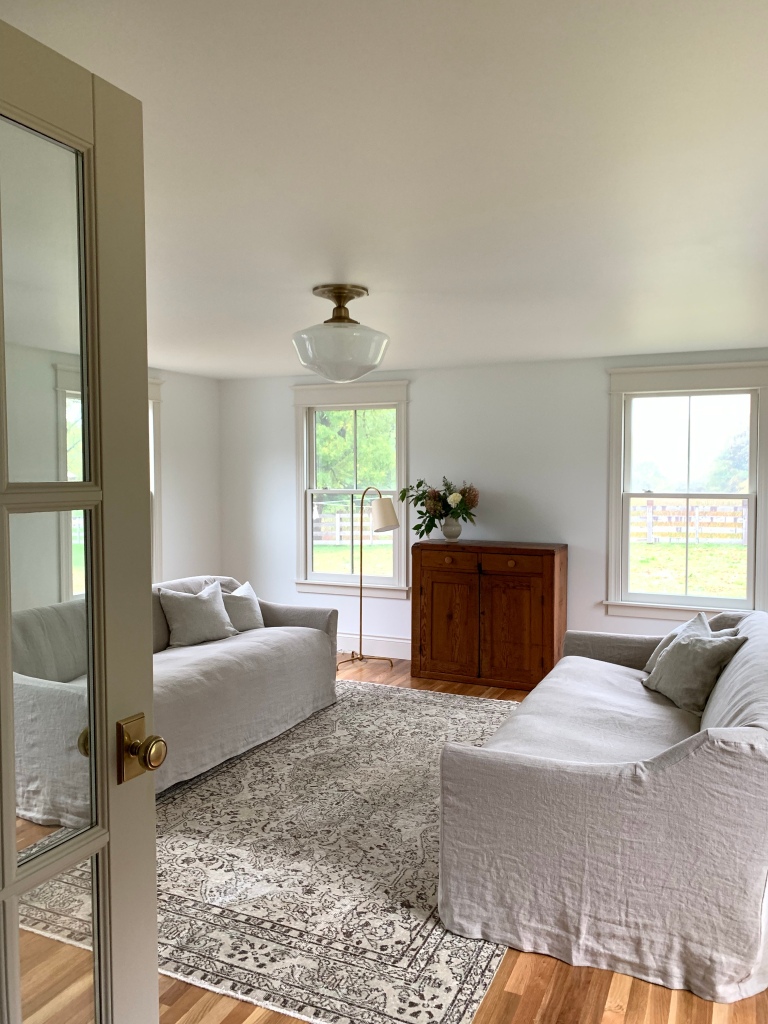
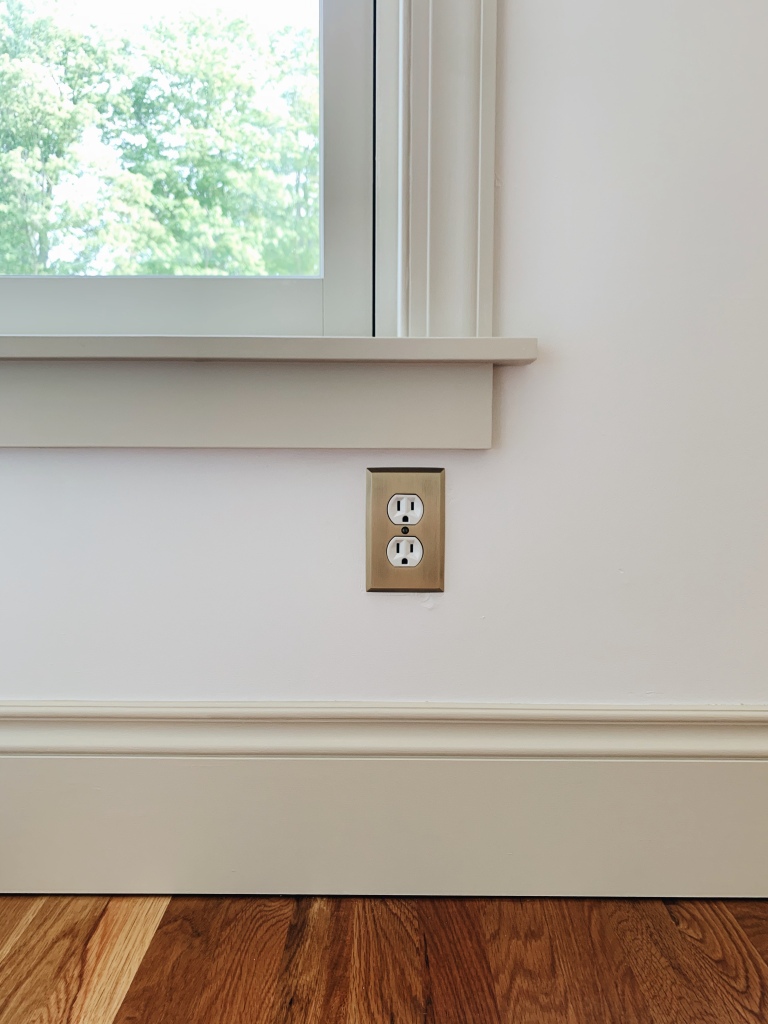
With an original size window and the exposed stone foundation Doug formed this spring, it was icing on the cake to make this space look as if it was built in the 1800s.

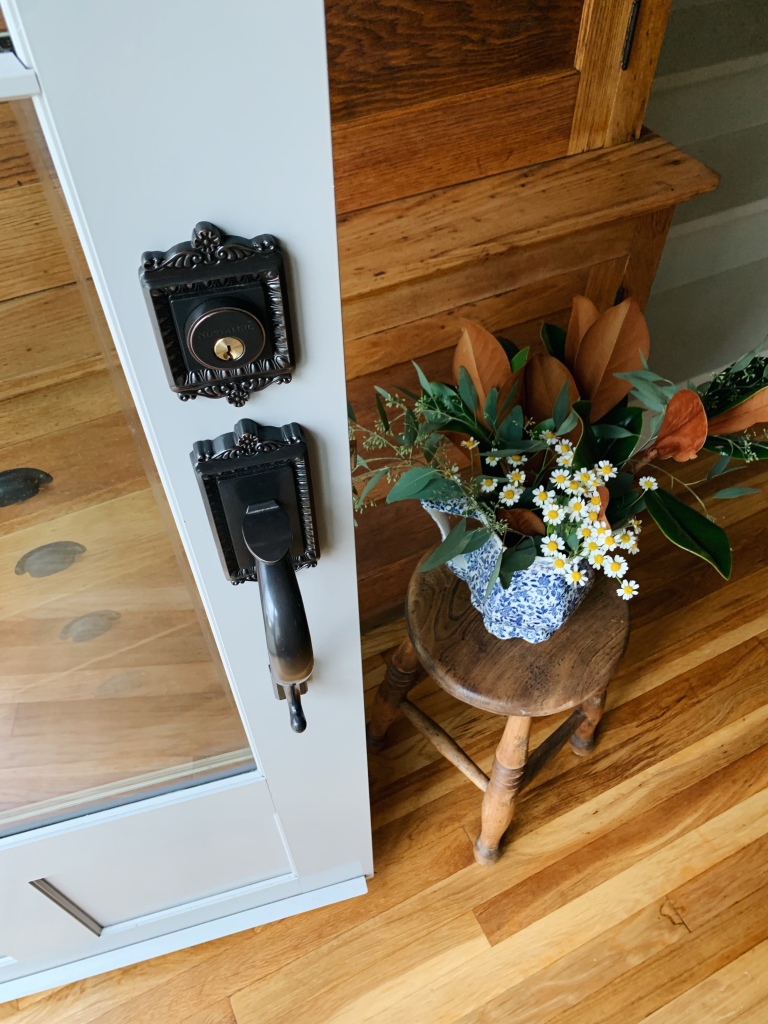
Next, he replaced the slider door with French doors. I carried the window design into the doors with 3/4 lite and a simple grid pattern. What a difference these doors made inside and out!

Photo by Amy Carroll Photography

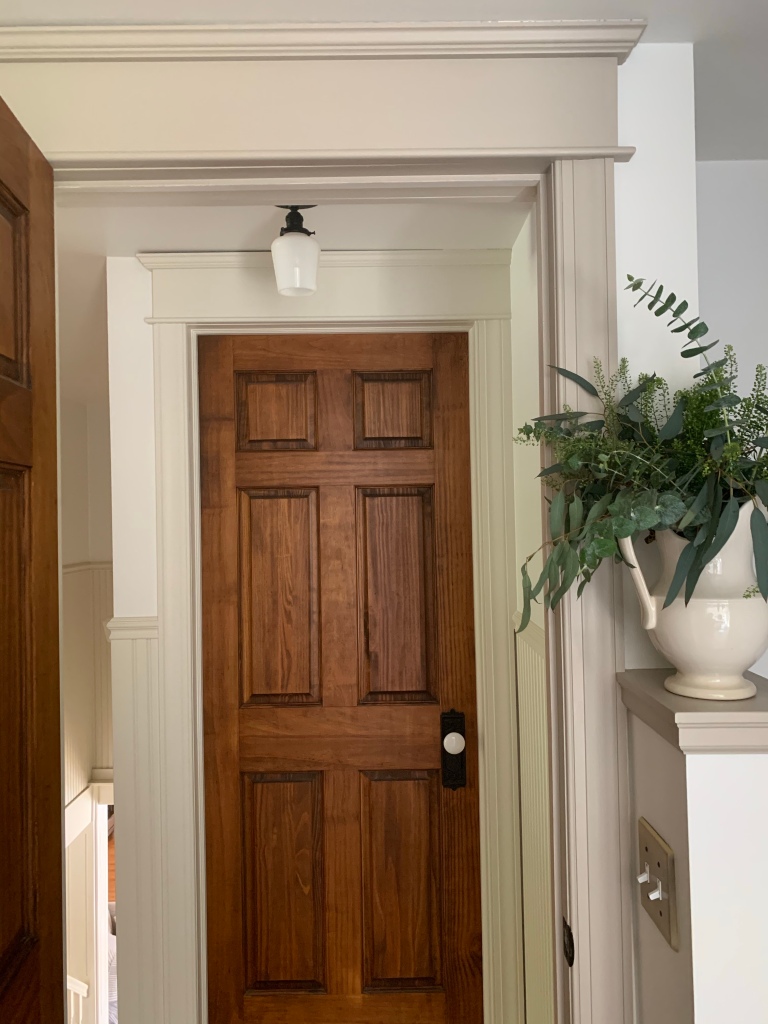
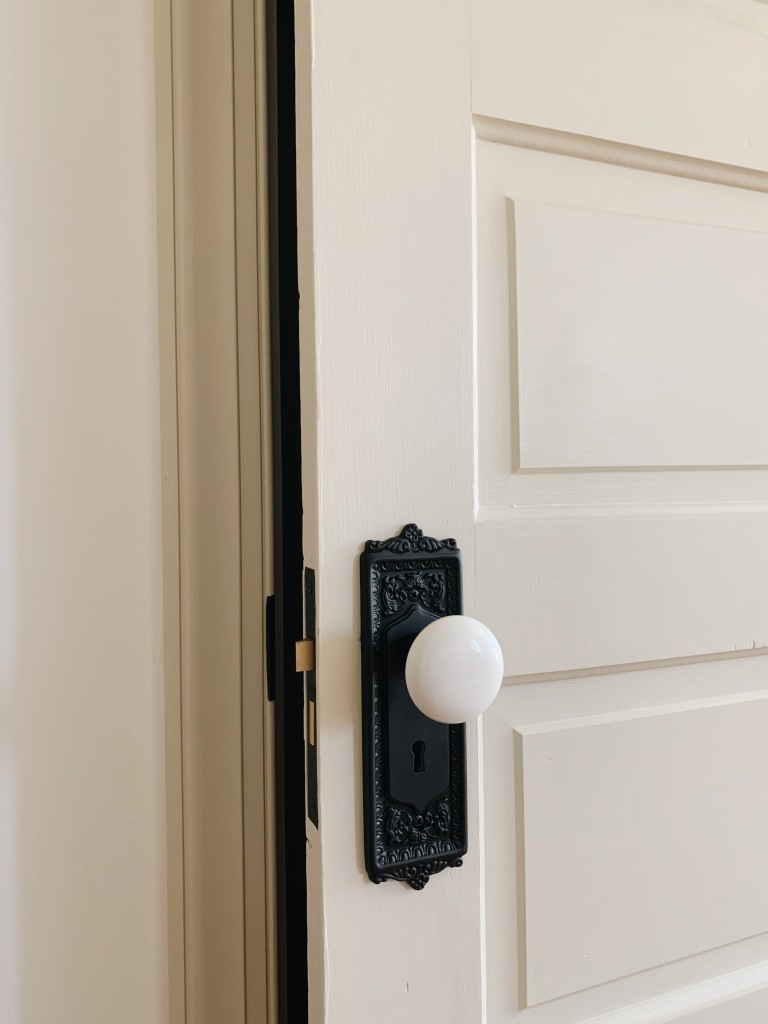
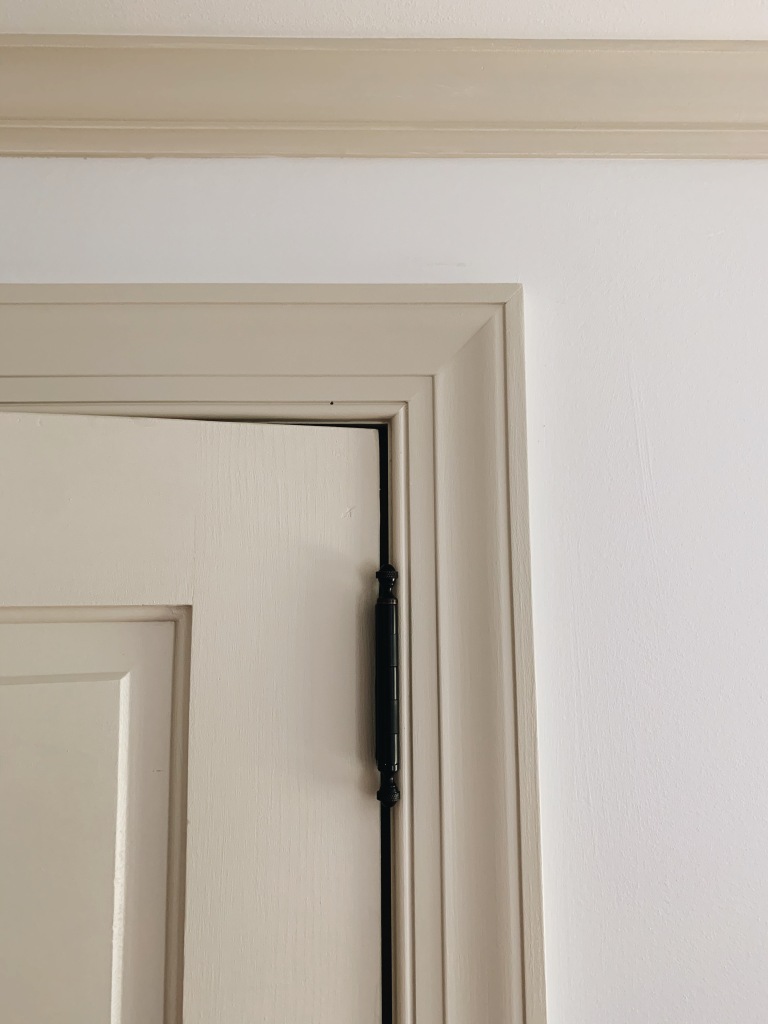
I choose this egg and dart door hardware from Nostalgia Warehouse. We have used their products throughout the home. We love their quality and design to again, keep this home looking true to its age as much as we can!

Photo by Amy Carroll Photography
Continue reading

Farm Lands and Skagerak

I wanted to post a little bit about this area and our new addition with this Drachmann bench made by Skagerak. Skagerak focuses on sustainable, minimal, and timeless designs.

I have had a few pieces of outdoor furniture over the years, but none have lasted more years than I can count on one hand. I was therefore honored when the opportunity to collaborate came along as the Drachmann series, which consists of tables and chairs as well, is turning 40 this year.

I have had my eye on Skagerak furniture for the past few years now as I stumbled on them amongst my searches for a more sustainable outdoor furniture that will last for decades to come. I love that with their teak furniture you can leave it outside through all seasons and can always freshen up with a light sand and adding Skagerak’s natural oil!

I photographed this bench in multiple areas to see what would fit best and to utilize this space most. My plan has always been to slowly make this little area of the property peaceful and inviting. The Drachmann bench is the perfect addition I had been looking for. My boys can’t wait to pull it up next to a little fire and take a seat while roasting s’more’s. I can’t wait to enjoy it for many more seasons to come.

Which placement is your favorite?

The Final Bedroom

I can’t believe the time has come to finish the last room of our home! It has been almost a decade slowly picking away at all that needed done in this old farmhouse, and the time has finally come to where we can finish the last bedroom in the house! 

We played musical rooms the past two years as we added on a two story addition with an extra bedroom for our growing family.  Our once two bedroom farmhouse because a three bedroom, and the extra space with two little boys has been such a blessing. 


The bedroom I am about to show you was once the nursery and then a big boy room which turned into a bedroom for two! I had a full size bed the boys shared the last few years while we hemmed and hawed about adding on to this home. 


I am honored to say we partnered with The Home Depot to finish this cozy space! We  played musical bedrooms once again, and this room will now be our guest bedroom!


Now for the how-to’s you know I love to share. Head over to The Home Depot to see the full blog post including a few of my most asked questions and a little how-to on things you see in this room!

Our Bedroom

It has taken a year to finally feel like our bedroom might be complete. I have tried to be much more intentional with our furnishings in our home. I think about the different options I can do with a space for weeks, if not months, before finally pulling the trigger. The want versus need is becoming more clear to me with every year that passes. I want our home to feel warm and welcoming, but also thoughtful and practical. As my husband has reminded me many times before, musical furniture isn’t the most easy thing. And even though it can grant instant gratification with a refresh to a space, there is something more fulfilling about being content. This leads me to our bedroom. I have always loved Six Penny for their products are quality made and the slip covers are beautiful. After having slip covered furniture, I am not sure I will ever own otherwise. With two boys and a farm, there is not much more satisfying than washing a dirty slip cover and having it come out looking brand new. I have two Gabriel chairs that I have washed several times over the past two years as they get lots of use!

What I love about the Amelia chair is that it is a larger size chair. It is larger enough to curl up on, or can even fit two! This is the perfect spot for the boys to curl up on my lap and read a book before bed, or just for me for some late night reading.

Thank you as always for stopping by, and please leave any questions or comments you might have!

Vintage rugs

Well guys, I think it’s finally time to share the top four reasons I love vintage rugs! I spoke with my friend Kim Gunther who has the most beautiful rug shop Woven Abode to give you guys all the tips!

1. Vintage rugs are better for the environment. Someone once told me “vintage rugs are made of iron.” Meaning they wear so well if treated properly you can have a rug for generations as opposed to modern rugs that are thrown out in a year or two!

2. They are handmade!! Can you believe that?! What talent! Not by machines like rugs are now made.

3. Heirloom quality. Now that you know these pieces are hand crafted, the imperfections only make them more beautiful. I tend to love the 100% wool vintage rugs because as I mentioned before they are wear better with age. Sun light and wear may cause a rug to lighten or fade, but for me that is what I love most about these rugs!

4. One of a kind. Yes, you heard me right! You will be the only one with that specific rug. How special is that?! I fell in love with the pattern, slight wear and earth tone colors of this rug. I tend to pick a rug over its colors and pattern over going for the perfect size.

And for one last tip to make your vintage rug last, be sure to turn off the beater option for your vacuum. That can cause lots of damage to your new to you beautiful vintage rug!

Living Room

I can’t begin to tell you how excited I am to be sharing the semi finished living room! We have been without a sofa and a place to lounge for months as we embarked this very large undertaking of adding on seven hundred sq feet.

I took this photo last summer and it shows you from the outside of the home.

The first story is now our living room. It is crazy to see just how far we have come when looking back to where we began spring of 2020.
Welcome to our new living room!

The one thing I love most about this room are the views. What I love most in homes are being able to look out and see all that surrounds us. I can’t wait to watch the seasons change while we lounge in the comfort of our home.

I know this room is still so bare, but I want to be intentional about what we add. It’s taken us so long to get this far, the rest will soon follow as I add comfort into the final design for everyone to enjoy.

This light I found off Fb marketplace last summer. The light switch I also have been excited for for over a year. When we purchased this home my husband remembers the “old part” having a push button light switch. I love that they make them again and we could add a touch of history and memories to this “new part” of the home. Both are originally from Rejuvenatation.

Now for the biggest surprise of all. Our sofas are from IKEA! They are the Farlov sofa three seater and I had them delivered to our home by the best- James! He let me know they could be purchased without a cover as I planned to order an upgrade from Bemz. Did you know they are old $450 without a cover?!!

James delivers and puts together everything ikea. If you’re in Michigan I would highly recommend him! His email is contact@hirehexi.com if you would like to get a quote!

I have been a fan of Bemz for years now and I knew I wanted their quality cover to make these sofas beautiful. I am honored to be one of the first to try their new line called “The Minimalist.” The design is absolutely beautiful and better than I could have ever imagined!

The difference with this cover is that it is one piece that goes over the entire sofa. The back has extra padding and tucks behind the seat cushion giving it a clean minimalist look!

For fabric, I chose 100% linen in the color pebble. I love the warmth and texture this fabric adds to the room and couldn’t be happier with its final look!

Thank you so much for stopping by! Feel free to comment with any questions you may have. I am always happy to help!

Photoshoot by Amy Carroll

I had the pleasure of spending the afternoon with Amy Carroll and her adorable son Mayer. As the boys played, she took photos of our new renovations. I am blessed for her friendship and talents as I will cherish these photos and our time together for a lifetime.

I found this light on Etsy a year ago, and have been storing it every since dreaming of this for someday. I can’t believe that someday is finally here.

Curtains are from Wovn home and I couldn’t imagine this room without them. We chose room darkening and have never slept this good before. Doug and I are both big fans of Wovn Home and will be adding similar curtains to these in the living room. Someday.

Thank you Amy and Mayer for spending your morning with us! And thank you all for stopping by! I hope you find inspiration here for your home, and leave me any questions you have!

Bathroom Update

It’s been a long haul after fixing the foundation and adding an addition in 2020. Last winter we finally began tackling the upstairs bathroom that was opened up to connect to the new addition months ago. When we added on the eighteen feet by eighteen feet two story addition, we had to remove a window from the bathroom to gain the second story. We drew plans to make the bathroom larger by making it just large enough have a window back. We decided on room spacing by adding walls around window placement. From the exterior all windows are the same size and space apart. For me, this triumphed all.

The mirror was in the home when we purchased it from my husband’s grandparents. We used stripper to remove the previous finish and used a water base poly. It was an anniversary gift I know his grandmother treasured for years and I plan to do the same ♥️.

The counter is soapstone. We have it in the kitchen and after years of loving it, I couldn’t imagine using anything else. Soapstone is a natural stone. Each stone unique in its own way. This stone I found as a remnant from a commercial company called Yellowstone. They do not often sell to residents, but I am so glad I found them and they were able to work with us. The sink and stone I purchased from them for less than $450.

Now, the faucet was a splurge. This faucet is from Kohler. You can find the link here. The finish is polished nickel per my good friend Grace Start’s advise! She certainly has an eye for design and I am constantly inspired by her home. You can follow her along here!

The cabinet is from Stoffer Home Cabinetry and I could not be more happy with the craftsmanship of the build and the quality of the finish. This vanity is specifically from the Highgate collection color Bromley Taupe.

For the lighting, I wanted to keep it classic. To me, nothing says classic farmhouse like black and white. The sconces are just what I envisioned. They are from Schoolhouse. I will link them here.

The tile is one of my favorite aspects of the bathroom. It is from Mosaictilesupplies. I found them after much looking in store and online. I am so pleased with the quality of the tiles and how they bring such a historic aspect to this bathroom! I chose an unglazed porcelain hexagon in an off-white.

We love these registers we used throughout the home from Signature Hardware

For the tub surround, I have to give Douglas (my husband) full credit for this one! We left the tub and toilet in their original locations to not only save time, but money. We both thought long and hard about this. Of course I had dreams of a claw foot tub for years and thought “it’s now or never.” And that choice was not an easy one to make! But after adding on to the home and with an endless list of projects left to do, this area had to do. Doug added doors to the open shelves and crown molding around the tub surround to turn this space from plain Jane to breathtaking in my eyes!

New tile, trim, and doors on the top two shelves and it feels like a whole new bathroom!

The walls are alabaster by sherwin Williams, and the trim color is custom matched to the cabinet mentioned above!

These doors are solid pine doors from Menards stained Provincial we did years ago!

Thank you all for being here and following along on our journey! I hope you find inspiration for your home and ask me any questions you have!

The Boys Room

Here it is. Finally after a year of working hard to fix the foundation of the old house that spiraled into adding on a two story addition- all so the boys could have a room!

This room was our old bedroom. Before the addition they shared a full size bed in an eight foot by nine and a half foot bedroom. To say we were all so excited for a little more space is an understatement!

After taking out the laminate Doug installed white oak floors to match the rest of the home. We used laminate years ago, and it was always my one regret that we didn’t use hardwoods. The oak floors not only gave this room an original charm, but they added strength too.

Next, he added a much needed closet! We debated adding a closet years ago, but also wanted to live in the space before adding something so permanent. I can’t believe we waited this long!

I found this door on Facebook marketplace and couldn’t wait to add it to this room! Many ask why our doors to not match, but when we bought the home it had hollow core doors most likely from the 70’s. One way I always dreamed we could add charm back to the home was with trim and doors. Back many years ago when we first started remodeling, we used solid pine doors stained as the most economical way to achieve some charm. I wrote a blog post about these doors that you can read here.

Over the last year as we started renovating again for various reasons, Doug was open to trying our hand at refinishing and framing old doors. Something I have always dream of and I couldn’t be more in love.

First we used striper to remove the old finish. Then I used a primer for wood followed by a wood paint.

Color Tapestry Beige by Sherwin Williams.

The trim we added is a very tall Victorian base we special ordered from a local mill and the trim around the windows Doug made while trying to resemble an old farmhouse the best we could.

I love the look of a thicker stool on a window frame. Also, I absolutely love these outlet covers from Nostalgic Warehouse in antique brass.
Handle above from Nostalgic Warehouse.
Hinges are acorn hinges from Grandeur Hardware.

I absolutely love the quality of the hardware from Nostalgic Warehouse. It truly is the icing on the cake!

Inside the closet to the left he added two rods for each boy to have their own space!

One thing I love about the closet, is the way Doug used these corbels to hold the rods! He drilled out the middle circle and they were the perfect diameter!

To the right he added shelves for their things. He had bought the hickory boards you see here a year ago “just because I loved them” Doug said. Him and I both love wood. He used a tongue old to keep their original ambers and love the character they bring to the boys closet!
Above is a photo of the attic door Doug built when we moved in. Before we had access to the attic from a hallway that we removed for the stairwell.

He repurposed the attic door by adding beadboard to the front and new trim on the door face. Otherwise paint goes a long ways!

I found these matching beds on Facebook. I had been so excited when I bought them as they were listed “twin beds,” but I quickly realized once home that they were in deed not twin in size. I believe these are called a super single, but I have twin sheets tucked in and everything seems to have worked out just fine.

Thank you all for stopping by and I hope you loved reading more about the love we pour into this space!

Continue reading

How I chose the “perfect” curtains

Curtains. By golly I never knew there could be so many choices from rod color, to fit, to fabric choices ranging in material to colors. Oh. my.

To begin, I cut to the chase and order samples. I can never truly make up my mind with assuredness until I’ve held samples in my hand and looked at them in the room in natural light and room lighting.

Of course, I fell in love with the neutrals. I tend to always gravitate to a natural, ivory, or a flax as opposed to a bright or optic white for any space. Never say never, but I almost never choose white white. I love the warmth off whites and creams make when used together.

Finally, after days (if not weeks!) of imaging the finished room, I narrowed it down to either black rods with Ivory linen, or brass rods with Flax linen.

Above sample is called “Ivory” in 100% linen
Above is called “Flax” in 100% linen

Okay, enough about color right? For our bedroom I am going to let you in on a little secret- I choose Ivory in 100% linen!! Our trim color is so stinking close to this fabric I am in love! Once hung, I know the drapes will make the windows feel as though they are twice as large and add warmth to the space all in one.

Now for the rods. My goodness this part can be twice as difficult sometimes! I used Wovn Home’s fit finder and it was spot on. It helped me find how far beyond and above the window the rods should hang to get the look I have been dreaming about! My dad always said this line that now Doug loves to remind me also “you know what you want, but you don’t know how to get there.” LOL. That is me in a nut shell. Really.

Thank you all for stopping by! I sure hope this helps some of you in your homes! I can’t wait to share more when they arrive!